Ask For A Proposal
Ask Us For
A Proposal

Mashing is the first mysterious biochemical process brewers get to witness with their own eyes. The sight of solid grist coming into contact with liquid strike water is aesthetically pleasing to look at and is complemented by the warm, doughy aromas released by this concoction that we call the “mash”. Even the groggy, morning shift brewer “striking in” at 4:30 AM has to appreciate this magic of the malt, the enzyme soup that makes beer possible.
Countless homebrew literature focuses on the importance of mashing. Unsurprisingly, this step retains its importance in commercial-scale brewing. So, what makes mashing such an intricate process? To answer that, it is worthwhile to review some of the ingenious solutions implemented to address malt modification deficiencies in centuries-old mashing techniques.
The main purpose of the malting process is to produce enzymes. An enzyme is a protein that catalyzes (speeds up) biochemical reactions. They are at work in your body as you read this right now, or in that struggling houseplant that you’ve been neglecting to water. In fact, enzymes are made by all living organisms, including sprouting barley.
Barley modification refers to the multitude of enzymes working collaboratively to breakdown starches, proteins, fats, cell walls, etc. within the barley kernel. The vast majority of malts made today are referred to as “well-modified” malts, meaning they have been given sufficient time, temperature, and germination mechanical action needed to produce the enzymes necessary for a single infusion mash.
Before modern malting technology though, malting techniques such as floor malting were used, producing lower enzyme-containing malts. Correspondingly, mashing techniques were used to address these low enzyme, or “under-modified” malts. Older brewers quickly learned that targeting various temperatures throughout the mash (known as a “step mash”) and holding the mash at these specific temperatures (called a “mash rest”) helped to create a higher quality wort. These increased temperature rests were typically achieved by several different methods, such as by heating the mashing vessel itself, by adding various amounts of boiling water to the entire mash, or by the German method (known as a “decoction mash”) of bringing a portion of the mash to a boil and then adding it back into the main mash. These techniques (perhaps unknowingly) helped to address pH, protein/sugar/lipid breakdown, starch conversion, and vital yeast nutrient release within the mash.

Photo: Example of a step mash graph including multiple “steps”

Photo: Example of a decoction mash. The dotted lines refer to a portion of the mash being brought to a boil and then added back to the main mash
Today, many craft breweries put a traditional focus on wort production, including the use of step or decoction mashing. The reality is that little is to be gained from the time and energy spent on these traditional mashing techniques if well-modified malts are used. Still, traditional methods or ingredient/process purity is often considered a priority by some brewers, and this stance certainly deserves respect.
A “single infusion” mash, as the name implies, requires one temperature rest, and only works sufficiently on well-modified malts. This is, by and large, the main mashing technique used by craft brewers today. With single infusions, the main enzymes the brewer is concerned with are α and β-amylase. Both enzymes work to convert starch molecules (amylose and amylopectin) into the sugary wort we need to make beer.

Photo: Example of a single infusion mash, with a “mash out” temperature increase at the end
Subtle differences in mashing temperature affect which enzyme is favored in the mash. For instance, β-amylase works optimally in the 144-149°F range, and α-amylase works optimally in the 155-167°F range. β produces more fermentable sugars, often resulting in a drier, more alcoholic end beer. α produces more long-chain sugars and dextrins (non-fermentable sugars), resulting in a fuller-bodied, potentially sweeter end beer. These temperature ranges are just one of many tools the brewer has in his or her tool bag to write a specific recipe.
Just like using any tool though, a mashing recipe control is useless if the brewer doesn’t know how to use it. This brings forth the importance of mathematical calculations. No, the brewing industry is not just about “quality control or sampling” despite how many times your annoying family member may ask you. There are a series of crucial, scientifically applied calculations needed for many steps within the process, including mashing. We recommend Stephen R. Holle’s Handbook of Basic Brewing Calculations for many practical examples of said calculations.
Through these equations, the brewer can begin discerning specific grain amounts, strike/step water temperatures and volumes, salt additions (typically calcium sulfate and calcium chloride), acidification necessary to address residual alkalinity, wort/beer color, etc. Long story short, good (maybe even great) beer can be made with a rudimentary understanding of this part of the process. However, to achieve consistent wort production, brewers need to know, understand, and apply such control measures for every brew.
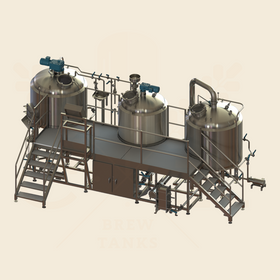
Okay, on to the process! The process flow for “mashing in” typically consists of the following pieces of equipment in this order:
The mill crushes the grain, producing milled grain (grist), which feeds into the grain conveyor. Grain conveyor types vary, but commonly screw augers or chain-linked tracks are used to move the grist from the bottom of the mill to the next stage. Both screw augers and chain-linked tracks are encased in a PVC type tubing. These conveyors may feed into a grist case or directly to the grist hydrator.
A grist case is simply a vessel to store the grist. These storage cases may be directly above the mash tun, or off to the side. They are especially useful for days when brewing more than one batch, because the brewer is able to mill the proceeding batch’s grain during “down time” or a holding period (like the boil) of the first batch. With a grist case, the brewer could even “mill in” the day before the brew day to potentially save time the next day. Grist cases may be fitted with CO2 purging capabilities to counteract oxidative reactions of milled grain. Again, they are an optional vessel that some breweries may choose to forgo.
Either the grist case or the grain conveyer feeds into the grist hydrator. Naturally, the grist hydrator is where the strike water (the water used for mashing) and grist first meet. The strike water is being delivered from the hot liquor tank (brewing water is referred to as brewing liquor).
Remember those calculations mentioned earlier? Well, they’ll help determine the total amount of strike water needed. This known volume can be measured with an inline flow meter. Finally, once the grist and hot strike water meet, they drop down into the mash tun where the enzyme magic continues to play out. To ensure even consistency, the brewer stirs the mash as it’s filling, either manually or via a motor that spins mash “paddles” inside of the tun.
Before all of this can happen though, it is beneficial to make sure all ducks are in a row, because as mentioned above, once the brewer starts it is “go time”. Some questions the brewer should be asking his or herself before “mashing in” include:
“Yes” answers to all of the above proceed (in some fashion) with turning on the conveyor(s)/mill/HLT supply pump, dumping malt bags into the mill or opening the grist case, monitoring the flow meter, and stirring the mash as it continues to drop in. Exact orders and actions will vary for a brewery’s specific operation, but the main take away is that there are a lot of moving parts for this step in the process.
Congrats, you’ve just “mashed-in”! You may be even a little (or very) sweaty from stirring and throwing 50-pound malt bags into a mill (this, of course, is more justification for a shift beer later in the day). Take in the aroma. Appreciate the enzyme biochemistry. Notice the beauty of the different malts changing the color and flavor right before your eyes. Snap out of it! Now you’ve got sparge water and the lauter to focus on!
Happy brewing.
Photo References:
Step mash graph:
https://byo.com/article/the-science-of-step-mashing/
Decoction mash graph:
http://braukaiser.com/wiki/index.php/Decoction_Mashing
Single infusion mash graph: